티스토리 글 작성하면 Github에 자동 커밋시키는 방법 (feat. 잔디 심기)

티스토리에서 글을 쓰면 Git에도 반영되어 아래처럼 잔디를 심어보려고 한다. 그러기 위해 Github Action을 이용하여 하루에 한번 티스토리의 RSS를 기반으로 Github에 커밋이 되도록 할 것이다.

사전 준비
1. 티스토리 RSS 설정
먼저 티스토리에서 RSS 설정을 확인해보자. 내 블로그 설정 > 관리 > 블로그 메뉴로 들어가서 RSS 전체 공개로 설정 후 저장한다. 이제 https://devpad.tistory.com/rss 같이 본인의 블로그 주소에 접속하면 RSS 정보를 확인할 수 있다.

2. repository 생성
Github Action으로 연동할 새로운 repository를 생성한다. 저장소 이름은 본인 소개 페이지를 많이 이용한다. (예를 들어 https://github.com/comsuter/comsuter)
참고로 repository 생성시 혹시라도 꼬일까봐 README 파일이나 gitIgnore 등 아무런 설정을 하지 않았다.
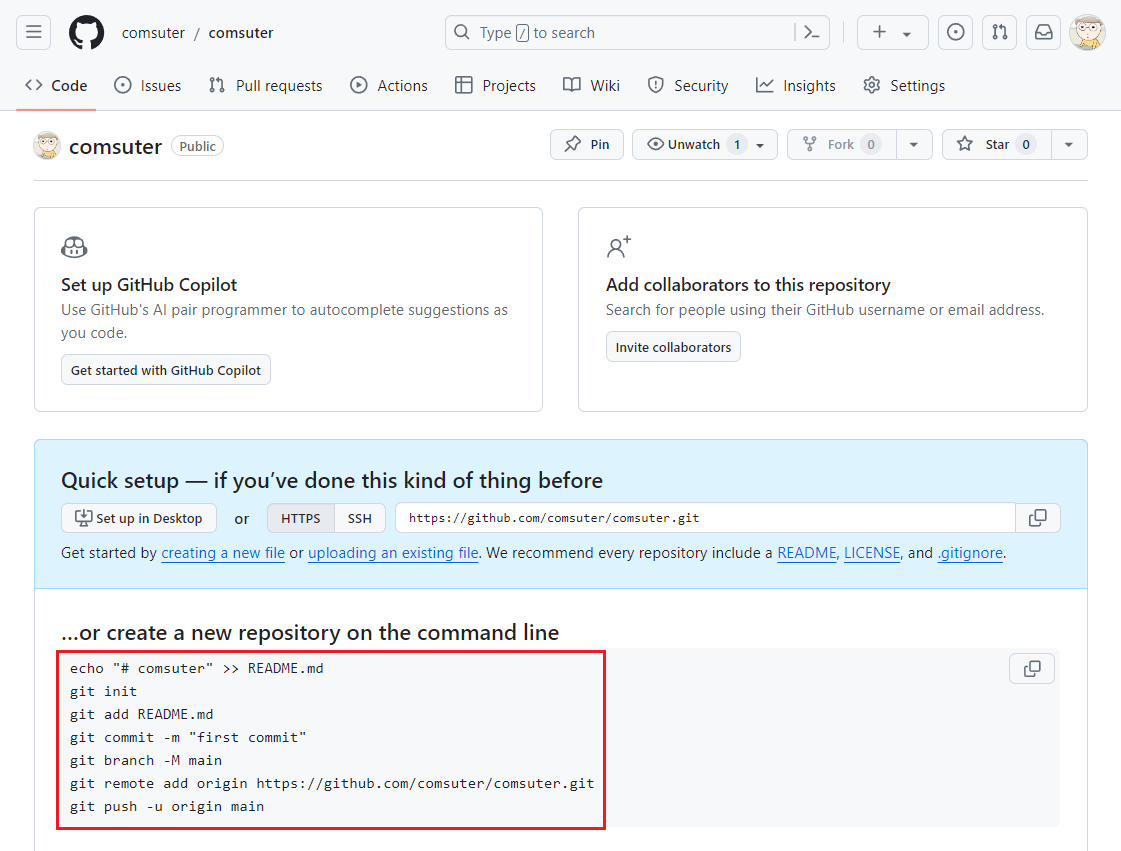
3. 로컬 환경과 repository 연동
내 경우 C:\comsuter 폴더를 만들어서 거기서 VsCode를 열고 아래 명령어를 순차적으로 실행했다. 명령어들은 위 사진에서 가이드하고 있는 명령어를 일부 가져다 쓴 것이다.
git init
git branch -M main
git remote add origin https://github.com/comsuter/comsuter.git
4. RSS 및 Git Action 파일 작성
1) package.json 파일 생성
package.json 파일을 생성하기 위해 아래 명령어를 콘솔창에 입력한다.
npm init -y아래 내용으로 파일이 생성된다.

2) rss-parser 설치
이어서 RSS 정보를 파싱할 수 있는 rss-parser 라이브러리를 설치한다.
npm i rss-parser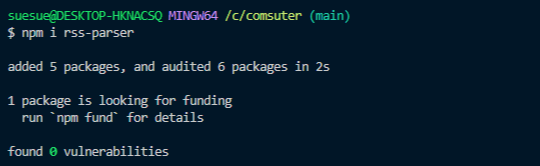
3) package.json 편집
package.json 파일을 열어서 "type": "module", "start": "node index.js",를 추가한다.
{
  "name": "comsuter",
  "version": "1.0.0",
  "description": "",
  "main": "index.js",
  "type": "module",
  "scripts": {
    "start": "node index.js",
    "test": "echo \"Error: no test specified\" && exit 1"
  },
  "keywords": [],
  "author": "",
  "license": "ISC",
  "dependencies": {
    "rss-parser": "^3.13.0"
  }
}
4) index.js 파일 추가
프로젝트 루트에서 index.js 파일을 추가한 뒤 아래처럼 작성한다. 이 파일은 최종적으로 README.MD에 작성될 내용이다. index.js의 스크립트를 node를 이용해서 수행하는 것이다.
import { writeFileSync } from 'node:fs';
import Parser from "rss-parser";

/**
 * README.MD에 작성될 페이지 텍스트
 * @type {string}
 */
let text = `# Hi there 👋

## 이런 환경에 익숙해요✍🏼

## 언어

<p>
  <img alt="" src= "https://img.shields.io/badge/JavaScript-F7DF1E?style=flat-square&logo=JavaScript&logoColor=white"/>
  <img alt="" src= "https://img.shields.io/badge/TypeScript-black?logo=typescript&logoColor=blue"/>
</p>

## 📕 Latest Blog Posts

`;

// rss-parser 생성
const parser = new Parser({
    headers: {
        Accept: 'application/rss+xml, application/xml, text/xml; q=0.1',
    }});

(async () => {

    // 피드 목록
    const feed = await parser.parseURL('https://devpad.tistory.com/rss'); // 본인의 블로그 주소

    text += `<ul>`;

    // 최신 10개의 글의 제목과 링크를 가져온 후 text에 추가
    for (let i = 0; i < 10; i++) {
        const {title, link} = feed.items[i];
        console.log(`${i + 1}번째 게시물`);
        console.log(`추가될 제목: ${title}`);
        console.log(`추가될 링크: ${link}`);
        text += `<li><a href='${link}' target='_blank'>${title}</a></li>`;
    }

    text += `</ul>`;

    // README.md 파일 생성
    writeFileSync('README.md', text, 'utf8', (e) => {
        console.log(e);
    })
    console.log('업데이트 완료');
})();
5) main.yml 생성
Git action 파일을 생성하기 위해 프로젝트 루트에서 .github\workflows 폴더를 생성한다. 해당 폴더 안에 main.yml을 생성한다.

main.yml 파일에 아래 내용을 기입한다. 스케쥴러 크론식(cron)을 이용하여 스크립트 실행 주기를 정할 수 있다.
# This is a basic workflow to help you get started with Actions
name: Readme Update
# Controls when the workflow will run
on:
push:
branches: [ main ]
pull_request:
branches: [ main ]
# 1시간에 한번씩 아래 스크립트를 실행한다.
schedule:
- cron: "0 */1 * * *"
# A workflow run is made up of one or more jobs that can run sequentially or in parallel
jobs:
# This workflow contains a single job called "build"
build:
runs-on: ubuntu-latest
steps:
- uses: actions/checkout@v3
- uses: actions/setup-node@v3
with:
node-version: 20
- name: Install dependencies
run: |
npm ci
npm install rss-parser
- name: Update README
run: npm start
- name: Check if there are any changes
id: verify_diff
run: |
git diff --quiet . || echo "changed=true" >> $GITHUB_OUTPUT
- name: Commit README
if: steps.verify_diff.outputs.changed == 'true'
run: |
git config --local user.email "본인의 Github 이메일"
git config --local user.name "본인의 Github 이름"
git add .
git commit -m "Update README.md"
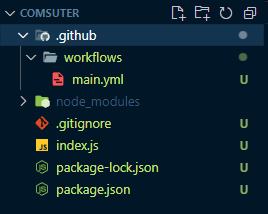
git push origin main6) .gitignore 파일 생성
프로젝트 루트에서 .gitignore 파일도 생성해주자. 중요한 건 아니라서 패스해도 된다.
/node_modules여기까지 진행한다면 프로젝트 구조가 이렇게 된다.
7) Github에 push 하기
여태까지 변경한 내용을 Github에 push한다. VsCode에서는 [커밋 및 동기화]를 이용해서 간단하게 push할 수 있다.

5. Git action permission 설정
여기까지 진행한다면 에러가 발생할 것이다. Github에서 Actions 탭에서 build 오류 내용을 살펴보면 403 permission 오류가 발생한다.

이를 해결하기 위해 Settings 메뉴로 들어가서 Actions > General로 들어간다.
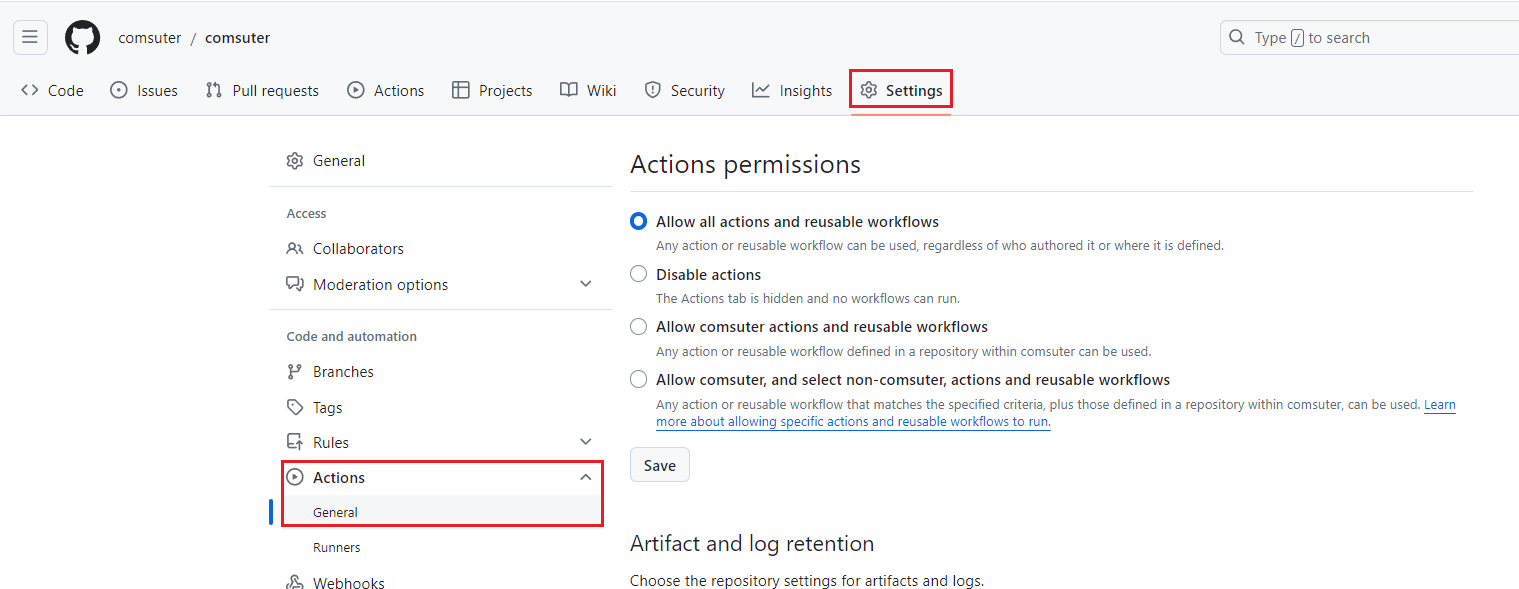
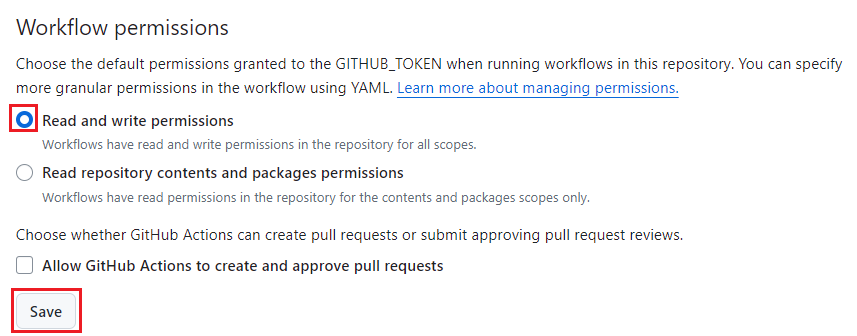
스크롤을 내리면 Workflow permissions 항목에서 [Read and write permissions] 선택한 뒤 저장한다.
다시 시간이 지난 뒤 Action을 확인하면 정상적으로 처리된 것을 확인할 수 있다. 참고로 크론식 주기를 짧게 잡으면 설정한 시간보다 좀 더 느리게 처리된다. 만약 하루에 한번씩 업데이트 되도록 하려면 cron 항목을 "0 0 * * *" 으로 변경하면 된다.

최종적으로 아래 사진처럼 최근 10개의 글만 업데이트 된다. 전체 코드 및 결과물을 확인하려면 https://github.com/comsuter/comsuter를 참고하자.
